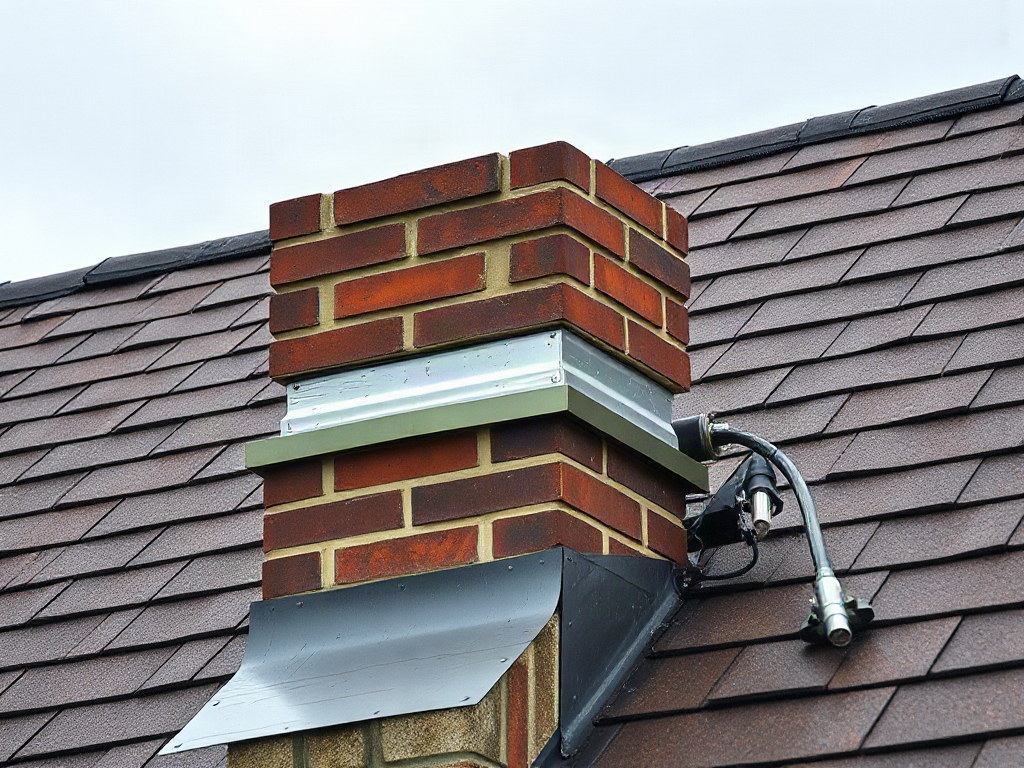
Flashing damage around chimneys and roof leaks are closely connected because failed metal joints, sealant, mortar, or shingle transitions let runoff enter beside the masonry. Warning signs include ceiling stains after wind-driven rain, damp roof decking, rusted step flashing, loose counterflashing, and cracked sealant at corners. Water may travel along rafters before becoming visible, so an interior stain does not Inspection should follow the entire chimney perimeter, while repairs should restore layered drainage rather than simply covering gaps with roofing cement.
What you’ll learn
This guide covers the following practical points:
- Why Chimney Flashing Starts Leaking — Chimney flashing fails where separate building materials must remain watertight while moving at different rates.
- Warning Signs and Leak Patterns — The timing and location of moisture provide better clues than the ceiling stain alone.
- How to Inspect the Chimney Perimeter — A safe inspection begins from the ground, an accessible window, or the attic rather than with an unsupported climb onto a wet or steep roof.
- Repair or Replace the Flashing? — Repair scope should match the failed layer rather than the most visible crack.
Why Chimney Flashing Starts Leaking
Chimney flashing fails where separate building materials must remain watertight while moving at different rates. Masonry, metal, shingles, and the wooden roof deck expand and contract with temperature and moisture changes. Proper flashing accommodates that movement while directing water onto the roof covering. A rigid patch of roofing cement may hide a gap temporarily, but it cannot reproduce this layered drainage path.
Most masonry chimneys use step flashing along the sloped sides, apron flashing at the downhill face, and head flashing or a cricket on the uphill side. Counterflashing overlaps the upper edges of those pieces and is secured into a masonry joint or another appropriate detail. Leaks develop when metal corrodes, fasteners loosen, counterflashing pulls away, or previous work leaves an exposed seam facing uphill.
The uphill side deserves special attention because it collects runoff, leaves, ice, and wind-driven rain. A wide chimney may need a cricket—a small peaked structure that divides water around the masonry—instead of allowing water to pool behind it. Requirements vary with roof design and applicable building codes, so the absence of a cricket is not automatically proof of defective work. Persistent debris or standing water behind the chimney, however, signals a drainage problem worth correcting.
Warning Signs and Leak Patterns
The timing and location of moisture provide better clues than the ceiling stain alone. Leakage that appears mainly during wind-driven rain may involve an exposed side joint or lifted counterflashing. Moisture after prolonged rain can point to slow entry behind the uphill flashing. A stain that grows during every storm may indicate a larger opening, saturated sheathing, or more than one defect.
Visible exterior warning signs include rust perforation, bent apron corners, missing step-flashing pieces, open mortar joints, sealant that has split away from metal, and shingles nailed through exposed flashing channels. Inside the attic, look for darkened sheathing, rusty nail tips, damp insulation, or water tracks on rafters near the chimney. Dry staining shows that water entered previously; it does not confirm that the leak remains active.
Do not assume that every stain beside a chimney comes from its roof flashing. A cracked chimney crown, deteriorated mortar, damaged cap, or condensation within a flue system may produce similar symptoms. Water can also enter higher on the roof and follow framing until it reaches the chimney opening. The useful test is correlation: inspect during or immediately after rain, trace wet material upward, and compare the path with exterior defects without opening or disturbing a venting system.
How to Inspect the Chimney Perimeter
A safe inspection begins from the ground, an accessible window, or the attic rather than with an unsupported climb onto a wet or steep roof. Binoculars and a camera with zoom can reveal displaced metal, cracked sealant, debris buildup, and damaged shingles. A qualified roofer is the safer choice when the chimney cannot be viewed without walking near an edge or when the roof surface is fragile.
Use a perimeter sequence so no transition is missed:
- Check the uphill face: Look for trapped debris, an open top edge, ponding marks, or damage to the cricket.
- Follow both sidewalls: Confirm that each step-flashing course overlaps the one below and remains covered by shingles and counterflashing.
- Inspect the downhill apron: Watch for lifted corners, punctures, corrosion, or an apron that is too short to shed water cleanly.
- Examine masonry joints: Note loose counterflashing, crumbling mortar, and sealant used as the only barrier.
- Compare with the attic: Map damp sheathing or water tracks to the corresponding exterior face.
A garden-hose test can mislead if too much area is soaked at once, and careless spraying may push water beneath otherwise functional overlaps. When a controlled test is appropriate, a professional can wet one lower section at a time, allow enough observation time, and progress uphill. Stop if water approaches electrical wiring, ceilings are bulging, or the source cannot be monitored safely.
Repair or Replace the Flashing?
Repair scope should match the failed layer rather than the most visible crack. A small, accessible separation in otherwise sound metal may be addressed by resetting a loose edge, repairing the masonry joint, or replacing compatible sealant where the original detail calls for it. Sealant should protect a joint, not form a continuous surface dam that traps water behind the flashing.
Replacement is generally the stronger decision when metal is rusted through, step flashing is missing or incorrectly lapped, shingles must be removed to reach concealed defects, or repeated patches have failed. Correct replacement usually requires lifting or removing shingles around the chimney, installing individual flashing components in drainage order, and restoring counterflashing at the masonry. Mixing incompatible metals or driving fasteners through exposed water channels can create the next leak even when the new work looks neat.
Interior damage should be handled only after the exterior entry route is corrected and the assembly has dried. Wet insulation may need removal, and softened or delaminated roof decking requires evaluation rather than cosmetic covering. A successful repair is indicated by dry sheathing through later storms, no growth in mapped stains, and intact joints after seasonal movement. Continued dampness means the diagnosis was incomplete, the patch failed, or another source—such as the chimney crown or masonry—remains active.
Frequently Asked Questions
Can chimney flashing be repaired without replacing the shingles?
A minor exposed joint may be repairable without broad shingle removal. Failed step flashing is woven between shingle courses, however, so surrounding shingles usually must be lifted or replaced to restore the correct overlaps.
Is roofing cement a permanent fix for chimney flashing?
Roofing cement is usually a temporary patch, especially across moving metal-to-masonry joints. Thick applications can crack, hide corrosion, and obstruct drainage; a durable repair restores the flashing layers and their mechanical attachment.
Why does the ceiling stain appear away from the chimney?
Water can travel along sheathing, rafters, nails, or insulation before dripping onto the ceiling. Trace active moisture uphill in the attic instead of treating the stain location as the exact entry point.
Can damaged chimney masonry look like a flashing leak?
Yes. Cracked crowns, open mortar joints, porous masonry, and cap defects can admit water above the roofline. The flashing and masonry should be examined together before choosing a repair.
When does a chimney leak require urgent attention?
Arrange prompt professional help for active dripping near wiring or a fireplace, sagging ceilings, saturated insulation, softened decking, or rapidly spreading stains. Avoid climbing onto a wet, icy, steep, or visibly damaged roof.
Conclusion
Effective chimney-leak work follows the water path instead of covering the nearest visible gap. Document when leakage occurs, inspect all four chimney faces, and compare exterior defects with attic moisture. Sound metal with a limited joint failure may justify a focused repair; corroded, poorly lapped, or repeatedly patched flashing usually warrants replacement. Confirm the result through later rainfall before repairing interior finishes.