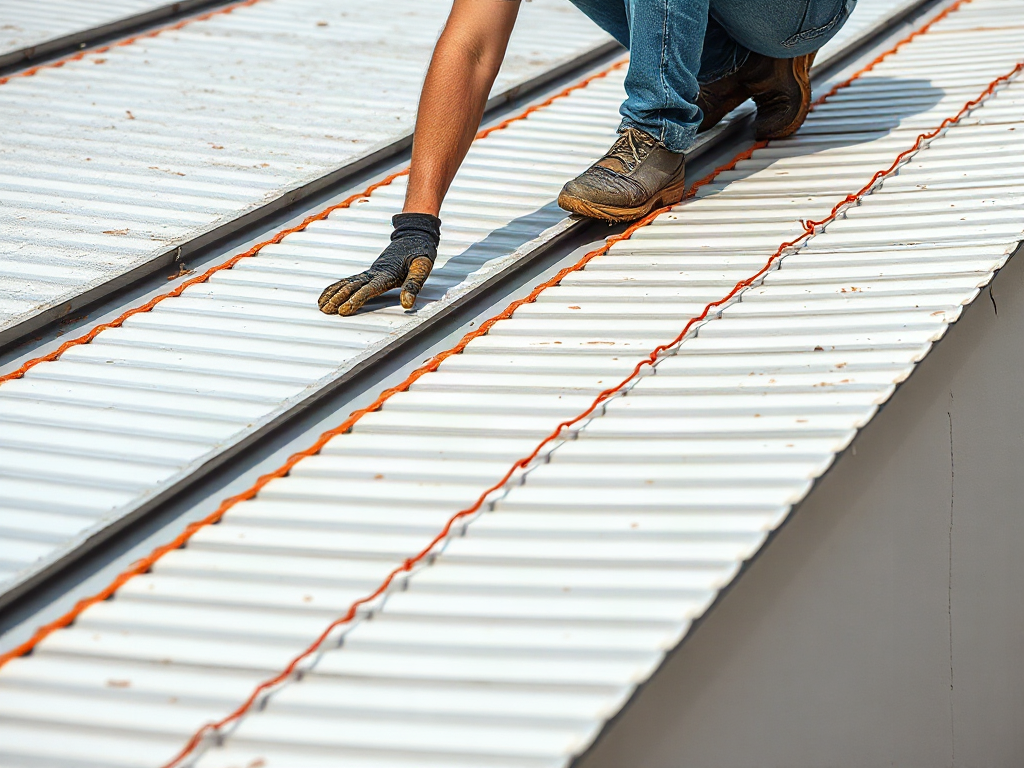
The best way to install a tin roof is to repair the roof deck first, apply the specified underlayment, square the panel layout, and fasten each metal panel exactly as its manufacturer directs. Begin at the eave and edge required for the panel profile, maintain the recommended overlap, and use compatible gasketed screws without crushing their washers. Eaves, valleys, sidewalls, penetrations, and the ridge need purpose-made flashing and closures rather than sealant alone. Because steep or elevated roof work carries a serious fall risk, use proper fall protection and hire a qualified roofing contractor when the deck, geometry, or access exceeds your experience.
What you’ll learn
This guide covers the following practical points:
- Identify the Roof and Panel Requirements — “Tin roof” commonly describes corrugated or ribbed metal roofing, but modern panels are more often galvanized steel, aluminum, or another coated metal.
- Prepare the Roof Deck and Underlayment — A sound, flat substrate gives the panels consistent support and provides reliable anchorage for their fasteners.
- Install and Fasten the Metal Roof Panels — Accurate layout is more valuable than rapid panel placement.
- Flash the Edges, Ridges, and Penetrations — Flashing details determine whether the roof manages water at its interruptions.
Identify the Roof and Panel Requirements
“Tin roof” commonly describes corrugated or ribbed metal roofing, but modern panels are more often galvanized steel, aluminum, or another coated metal. The exact panel profile matters because exposed-fastener panels, concealed-fastener standing-seam panels, and structural panels have different deck, slope, overlap, clip, and fastening requirements.
Read the panel manufacturer’s installation manual before ordering materials. Confirm the minimum permitted slope, required substrate, panel orientation, fastener type, screw spacing, end-lap treatment, and compatible flashing. Local building requirements may also govern wind resistance, underlayment, ventilation, ice protection, and whether an existing roof may remain in place. A generic screw pattern or overlap copied from another panel can produce leaks or allow panels to lift in high winds.
Measure each roof plane from eave to ridge and along the eave. Account separately for valleys, hips, dormers, chimneys, and plumbing vents. Ordering panels cut to the full slope length can avoid horizontal end laps, although long panels are harder to transport and handle without bending. Before work begins, verify these essentials:
- The framing and deck can support the proposed assembly.
- The roof slope is acceptable for the selected panel system.
- Fasteners, closures, sealants, and flashing are approved for that system.
- Panel and trim metals are compatible and will not cause galvanic corrosion.
- A safe lifting, staging, and fall-protection plan is in place.
Complex valleys, low slopes, rotten decking, and roofs near electrical service lines are strong reasons to use a qualified contractor. Metal sheets are awkward in wind, their cut edges are sharp, and a dry metal roof can still be slippery.
Prepare the Roof Deck and Underlayment
A sound, flat substrate gives the panels consistent support and provides reliable anchorage for their fasteners. Strip or expose enough of the existing assembly to inspect for soft sheathing, loose boards, raised nails, moisture damage, and uneven transitions. Replace deteriorated wood and correct framing problems before covering them; metal panels do not compensate for a weak deck.
Whether panels may be installed over old shingles depends on the panel listing, manufacturer instructions, local requirements, and roof condition. A recover installation can reduce tear-off work, but it may hide damaged sheathing and transfer surface irregularities into the new metal. Battens may be allowed for some systems, while others require continuous decking. Do not assume that horizontal furring is suitable merely because the panels appear stiff.
Apply the specified underlayment from the eave upward so upper courses shed water over lower courses. Keep it smooth, observe required overlaps, and integrate eave or valley membranes where the roof design and local conditions call for them. Underlayment is secondary drainage protection; it does not excuse poorly formed panel seams or flashing.
Ventilation and condensation control must be planned as part of the assembly. Warm, moist indoor air reaching a cold metal surface can condense, particularly above bathrooms, kitchens, or unconditioned agricultural spaces. The suitable solution may involve ceiling air sealing, insulation, intake and exhaust ventilation, or a manufacturer-approved condensation-control layer. Trapping moisture between incompatible layers can damage decking even when rain never enters.
Install and Fasten the Metal Roof Panels
Accurate layout is more valuable than rapid panel placement. Establish a reference line perpendicular to the eave rather than trusting the rake edge to be square. Test the roof plane with measurements before fastening the first sheet, because a small error at the starting edge becomes conspicuous after several panels.
- Set the eave trim and related flashing. Install components in the sequence specified for the panel system so later pieces lap in the direction of drainage.
- Position the first panel. Align its lower edge for the required eave projection and square its side to the reference line.
- Fasten without distorting the panel. Use the specified locations and spacing. Drive exposed fasteners perpendicular to the roof surface until the sealing washer is seated, not bulging or split.
- Add the next panel. Engage or overlap the side seam as directed, checking alignment at both the eave and ridge before fully fastening it.
- Recheck the layout regularly. Measure from the installed panel edge to the reference or rake at several points so accumulated drift can be corrected early.
- Cut panels with an approved method. Remove metal filings promptly because hot fragments and swarf can damage protective coatings and create rust spots.
- Finish the last panel deliberately. A field-cut edge may require hemming, fastening, or coverage by rake trim according to the system details.
Fastener placement is not universal. Some exposed-fastener profiles are secured through flat areas, while others may specify different locations; standing-seam systems usually use concealed clips. Follow the panel documentation rather than treating one method as standard for all metal roofing.
Do not stretch, force, or excessively compress panel sidelaps. Metal expands and contracts as temperatures change, and concealed-fastener systems are designed to accommodate that movement through clips or slotted details. Incorrect fixed points can cause buckling, enlarged holes, or stressed seams. When walking is permitted, step only where the manufacturer recommends and use footwear that will not damage the finish.
Flash the Edges, Ridges, and Penetrations
Flashing details determine whether the roof manages water at its interruptions. Install drip edges, rake trim, valleys, sidewall and headwall flashing, ridge caps, and closures in the prescribed order. Every upper component should direct water onto the drainage surface below rather than behind it.
Valleys deserve particular care because they carry concentrated runoff. Keep fasteners out of prohibited drainage zones, maintain the required panel clearance, and do not narrow the valley with excessive sealant. At walls and chimneys, use properly lapped step, sidewall, apron, and counterflashing details as applicable. Smearing roof cement along an exposed joint is not an equivalent substitute.
Roof penetrations need boots or curbs designed for the panel profile and service temperature. A plumbing vent passing through a panel rib, for example, may be difficult to seal reliably; adjust the layout when feasible so the opening falls in a workable flat area. Follow the flashing manufacturer’s limits for roof pitch, pipe diameter, and sealant placement.
Closures at eaves and ridges can block wind-driven rain, insects, and debris while preserving intended ventilation. Use vented closures where the ridge is part of the ventilation system. Unapproved foam or a solid closure in the wrong location may obstruct airflow or deteriorate prematurely. Sealant should remain protected within approved laps whenever possible because exposed beads weather faster and are difficult to inspect.
Inspect the Finished Roof
A final inspection should trace the roof’s drainage path from ridge to eave. Look for panels that have crept out of square, open seams, missing closures, reversed flashing laps, cut edges left unprotected, and debris trapped in valleys. Confirm that gutters and downspouts can accept runoff without backing water under the eave.
Check exposed fasteners for three conditions: washers should be centered, firmly seated, and undamaged. An underdriven screw may leave a gap; an overdriven screw can crush the washer or deform the panel; an angled screw may seal unevenly. Replace faulty fasteners as directed rather than trying to hide them beneath a mound of sealant.
Remove drill shavings, cuttings, pencil marks, protective film, and unused hardware. Metal particles left on coated panels can oxidize and stain the finish. Photograph concealed details during installation and retain the product instructions, color information, and warranty documents for future repairs.
Inspect the roof after severe weather and periodically thereafter from a safe location. Warning signs include loose trim, backed-out screws, displaced closures, corrosion around cut edges, water staining in the attic, or new panel movement. Do not walk onto a wet, icy, steep, or damaged metal roof to investigate; use a roofing professional when close access cannot be made safely.
Frequently Asked Questions
Can a tin roof be installed directly over shingles?
Sometimes, but only when the panel manufacturer and local requirements permit it and the existing deck is sound. Hidden rot, uneven shingles, added weight, and condensation details should be evaluated before choosing a roof-over installation.
Do metal roof screws go through the ribs or the flat areas?
The correct location depends on the specific panel profile. Use the fastening diagram supplied for that product; copying the pattern from a different metal panel can cause leaks or inadequate wind resistance.
What underlayment should go beneath a metal roof?
Use an underlayment approved for the roof assembly, climate, slope, and service temperature. Synthetic, felt, and self-adhering membranes have different applications, and any membrane touching hot metal must be rated for that exposure.
How much should tin roof panels overlap?
Side and end overlaps vary by panel design, roof slope, and manufacturer. Follow the product's installation instructions; do not choose an overlap by appearance, and avoid end laps when full-length panels are practical.
Can a homeowner install a metal roof without a contractor?
A skilled homeowner may handle a simple, low-slope accessory building with a documented panel system and suitable fall protection. Homes with valleys, penetrations, steep slopes, damaged decking, or difficult access are better assigned to a qualified roofer.
Conclusion
A durable metal roof depends on decisions made before the first panel is fastened. Verify the panel specifications and roof slope, expose and repair weak decking, create a square layout, and treat flashing as part of the water-shedding system rather than a cosmetic finish. During the final check, correct distorted washers, open seams, metal debris, and incomplete closures. If safe access or a difficult detail is uncertain, pause the installation and have a qualified roofer evaluate it.